Monkey Puppet Community Workshop
Free online step-by-step tutorial for families, created for Ignite Theatre’s community show, The Twits, December 2024. Make your own Mugglewump Monkey Puppet!
STEP 1: Collect all the materials you’ll need: Tin foil, tissue paper in at least two colours, 4cm polystyrene ball, 5cm polystyrene egg, 2 lengths of string (each 30cm long), wooden skewer, pritt stick, 2 paper straws, masking tape, 1 pipe cleaner, black pen, scissors
STEP 2: Make a “muzzle” shape from a small piece of tin foil and attach it to the polystyrene ball “head” with masking tape (see next image!).
STEP 3: With another small piece of tin foil, make “eyebrows” and attach that to the head with more masking tape. Make sure you cover the tin foil with masking tape, and it’s securely attached to the head.
STEP 4: Tear up two colours of tissue paper into small pieces. Using pritt stick, cover the head and face with the tissue paper. You can apply the glue to the pieces of paper (it can get a bit fiddly)…
…or you can apply the pritt stick to the polystyrene ball itself. I like to add a load of glue on top of the paper too, to make sure it’s fully covered. I like the muzzle and eyebrows to be a different colour to the head, but you can experiment!
STEP 5: Do the same with the egg “body”. You’’ll need to poke the skewer all the way through the egg lengthways, so it’s a good idea to do this now as it means you can hold onto the skewer as you apply the tissue paper.
STEP 6: Cut the two straws into four pieces each (so you have 8 pieces in total, of about the same length). If you like, you can cover the straws in tissue paper first, by wrapping a strip of tissue paper around the straws before cutting them.
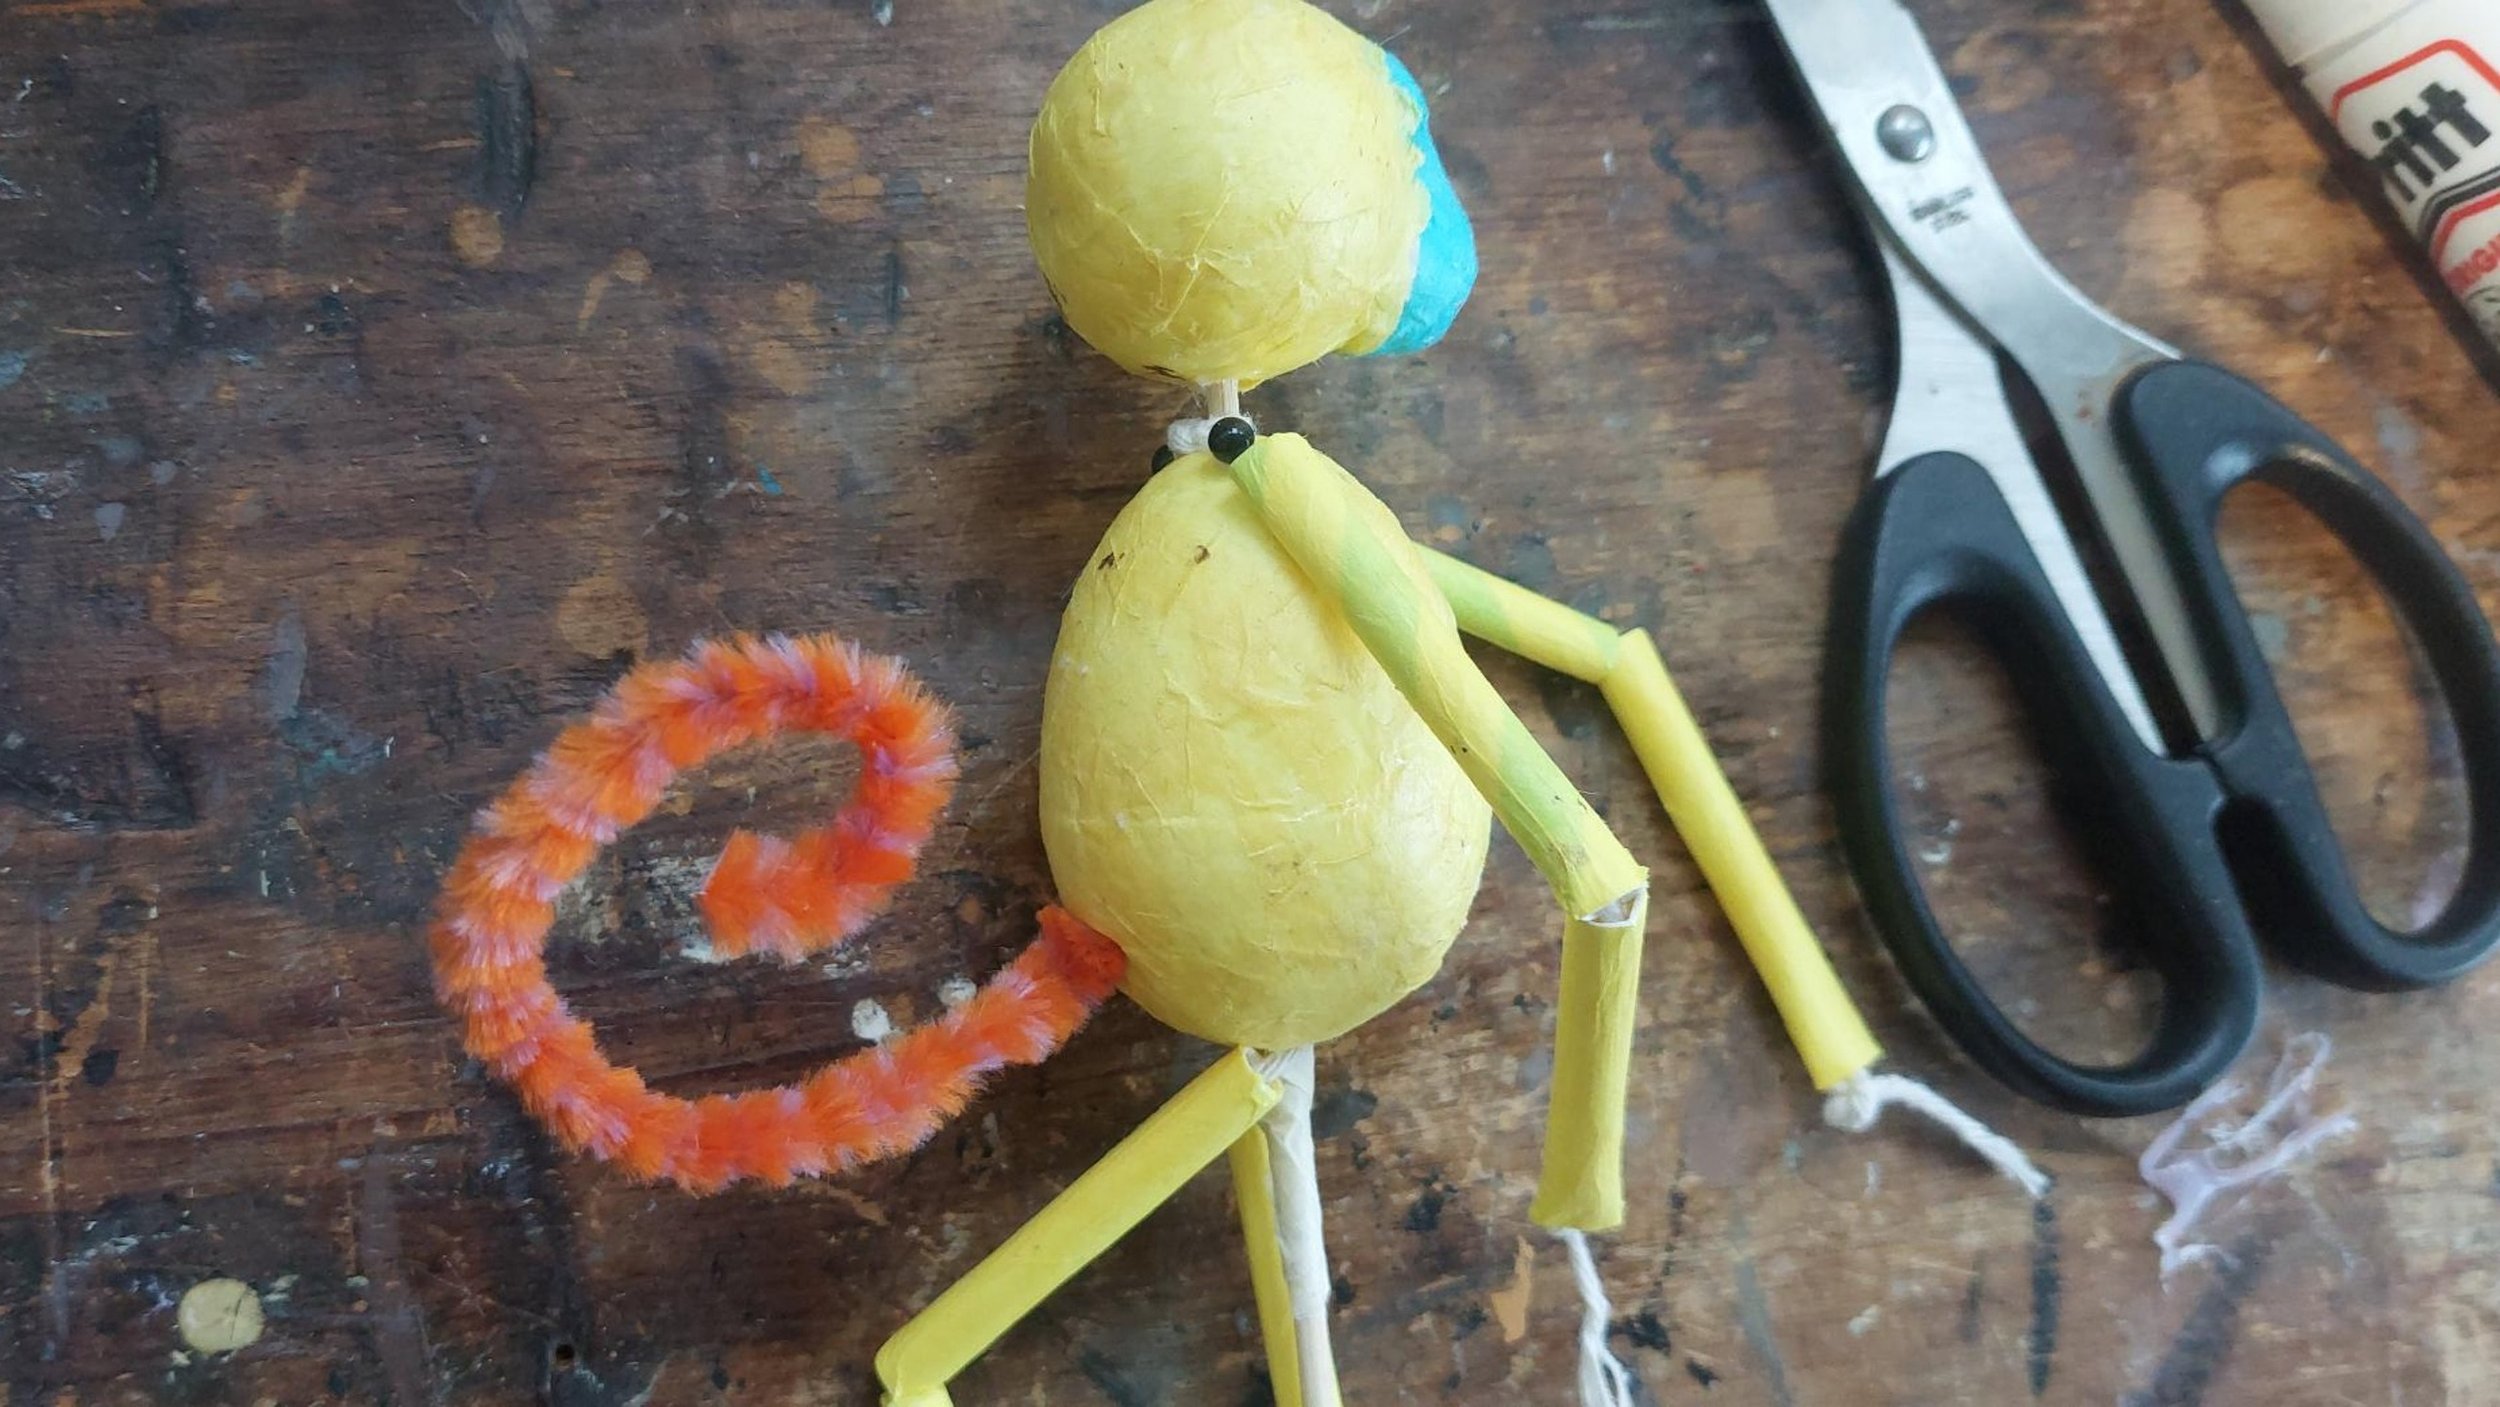
STEP 7: Two pieces of straw will make one limb. Tie one of the lengths of string onto the skewer, above the top of the egg, so that there are even lengths of string on each side. Use a double knot. Then thread two pieces of straw onto each length of string. Make sure you’ve left about 1cm of string exposed next to the knot on the skewer.
STEP 8: Flatten the piece of straw at the end of the length of string, and tie a big knot in the string at each end, to hold the straw pieces in place. With the second length of string, repeat this process, but on the skewer at the bottom of the egg, to create legs.
STEP 9: Arrange the egg and limbs so that there is about 2.5cm of the exposed top of the skewer sticking out the top of the egg. Put a load of pritt stick into the top of the skewer, and push the head onto the exposed skewer. You can stick pins into the exposed string and the egg body as shown, to keep the arms from turning around the skewer.
STEP 10: Push the pipe cleaner into the lower part of the back of the body (where the monkey’s “bottom” would be!). You can wrap a piece of masking tape around the skewer underneath the egg, to help stop the “legs” from slipping down the skewer.
STEP 11: Add features to your monkey’s face! I used black pen, and black round-head pins for the eyes. I also added some nice trim as a collar, stapled into place, and a tufted brow from scraps of faux fur.
You can add all sorts of things to decorate your monkey! Sequins can be pinned onto the polystyrene, or glued with PVA. You can even make little hats from card and pom-poms, or clothes for your little monkey from scraps of fabric, or old socks!


